 Vidiyo
Create a channel
Create a 24/7 channel in Vidiyo Studio: name it, choose its audience and language, add videos to its library, then publish it to the guide.
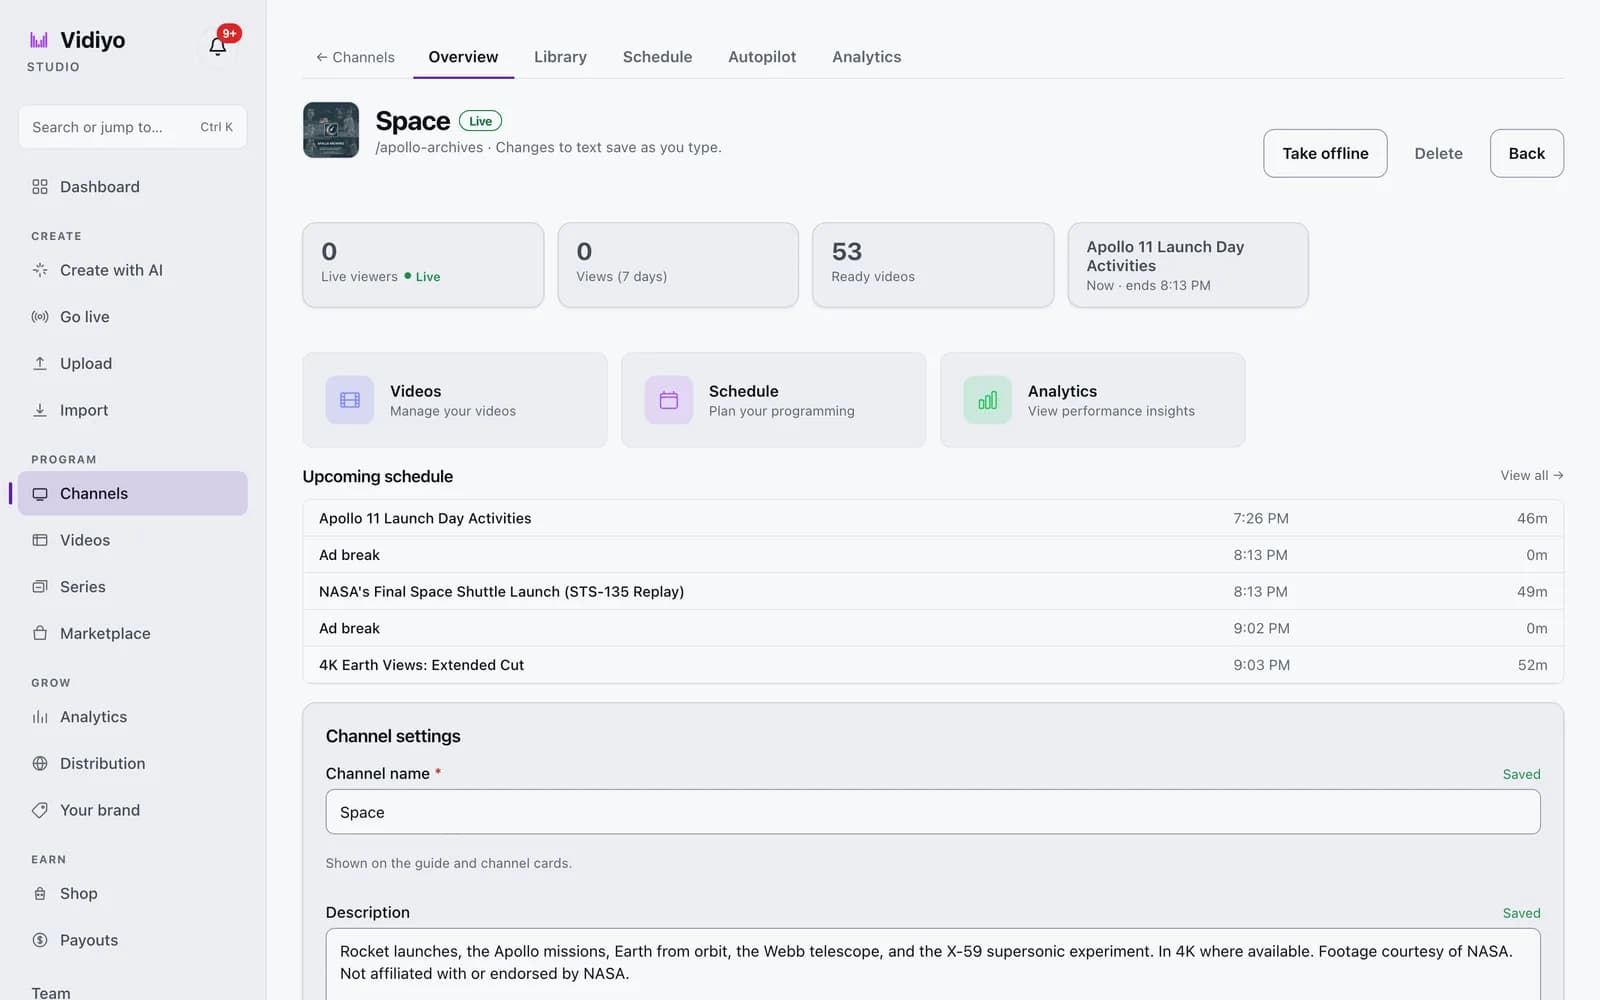
A channel is a 24/7 linear feed that viewers find in the guide and tune in to. You create it in Studio, give it a library of videos, and publish it. From then on it plays whatever the schedule says.
This tutorial creates a standard channel: general audience, 24/7 linear. You can create as many channels as you need.
Before you start
- Sign in to Vidiyo Studio with a verified email. Channel creation is blocked until you verify.
- Have at least one video uploaded and finished processing. You need one to publish.
Steps
1. Open Channels
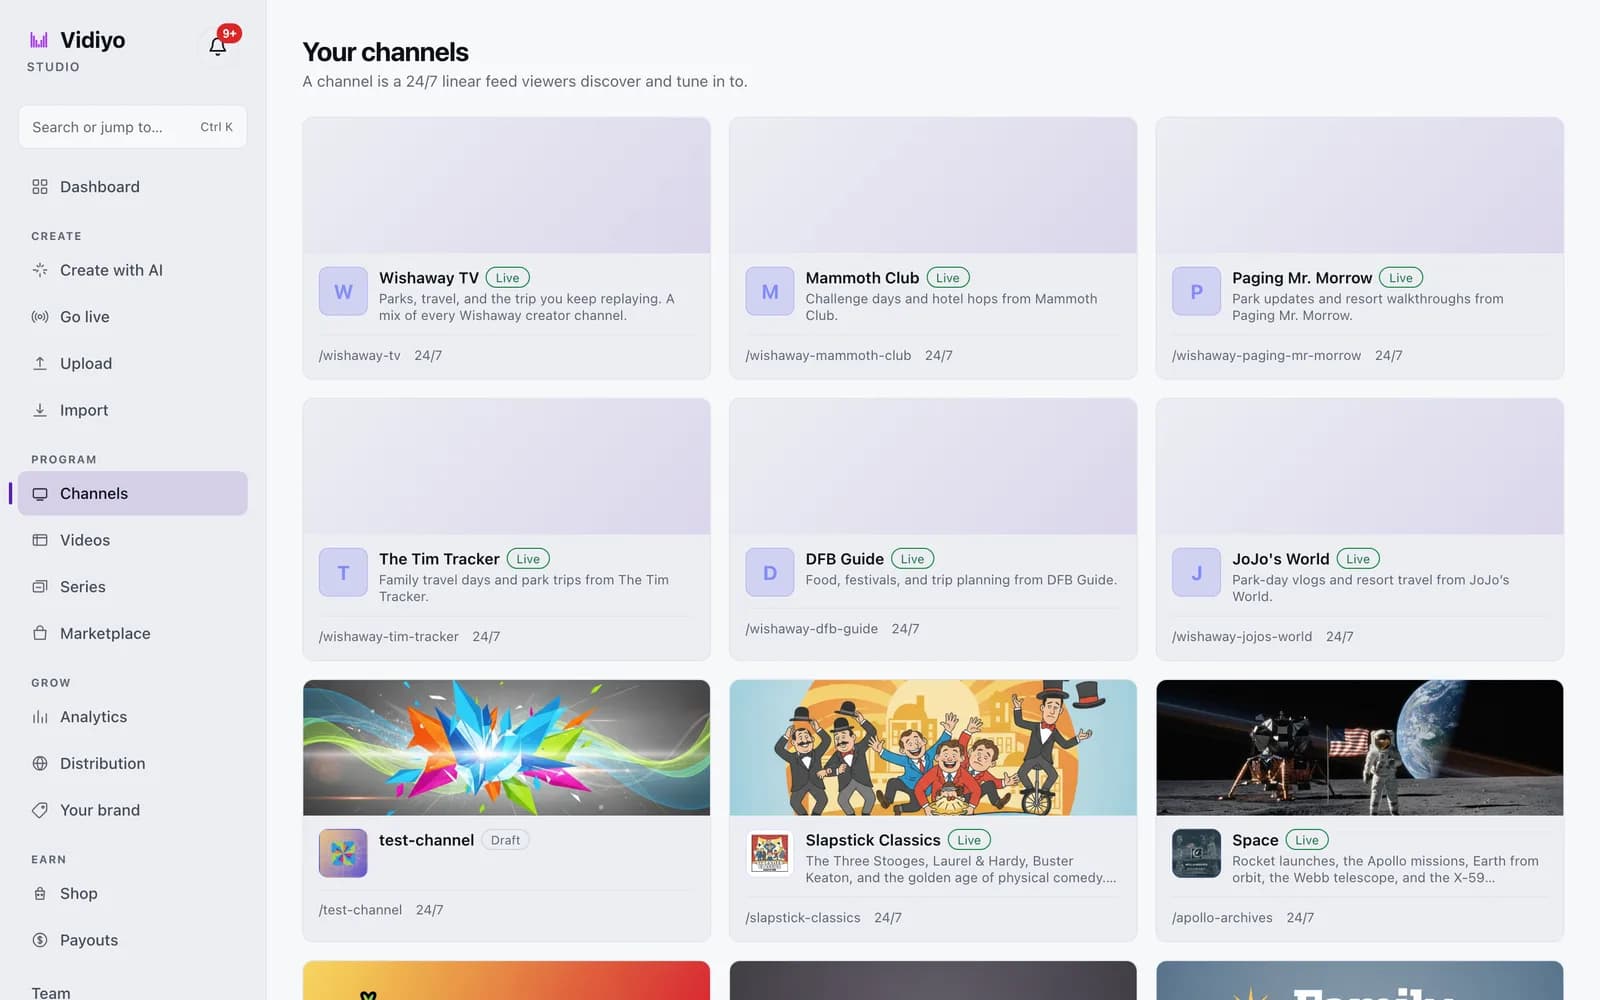
In the Studio sidebar, under Program, click Channels. The Your channels page lists every channel you own with its status chip: Draft or Live.
Click New channel in the top right. The same button sits on the dashed card at the end of the grid.
2. Fill in the Create a channel form
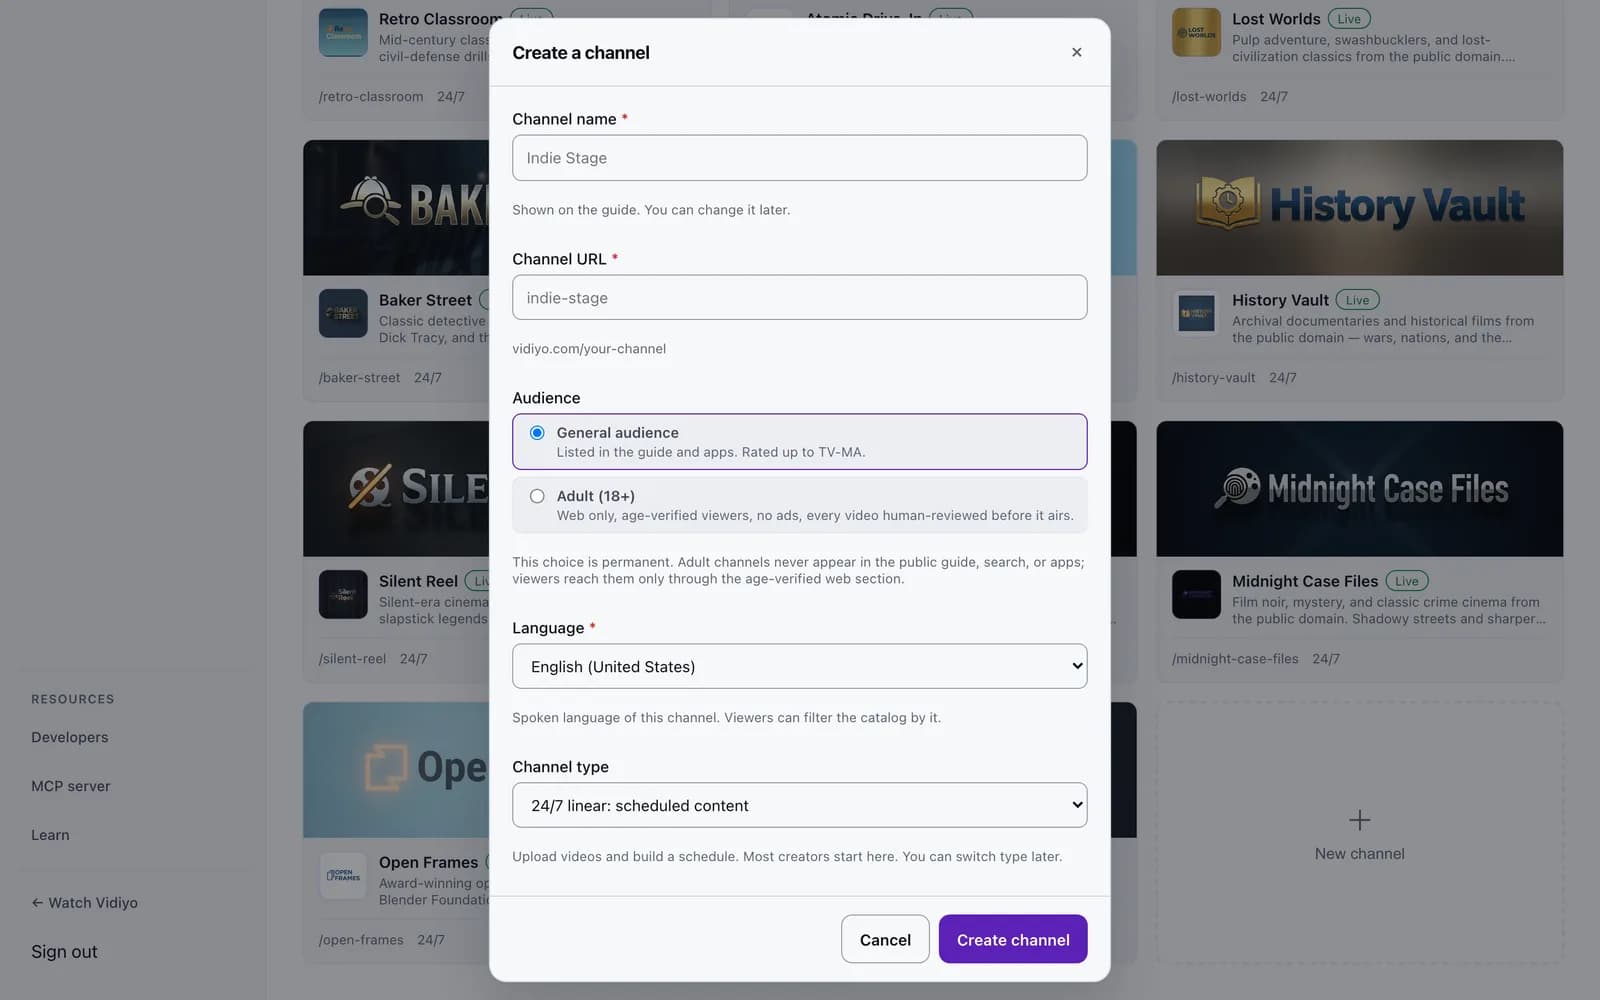
The Create a channel dialog asks for six things.
- Channel name (required). Up to 120 characters. Shown on the guide. You can change it later.
- Channel URL (required). Studio fills this from the name. Lowercase letters, digits, and hyphens, 3 to 80 characters. Your channel lives at vidiyo.com/your-channel. If the URL is taken, the form says so.
- Audience. General audience is listed in the guide and apps, rated up to TV-MA. Adult (18+) is web only and age verified. This choice is permanent.
- Language (required). The spoken language of the channel. Viewers can filter the catalog by it.
- Channel type. Leave it on 24/7 linear: scheduled content. Most creators start here, and you can switch type later. The other types are Live: RTMP stream, Simulcast: mirror another source, and Existing stream: HLS + XMLTV guide.
- Short description. Optional, up to 400 characters. Shown on the channel card.
Click Create channel. Studio confirms that the channel is ready and it appears in your list as a Draft.
3. Add videos to the programming library
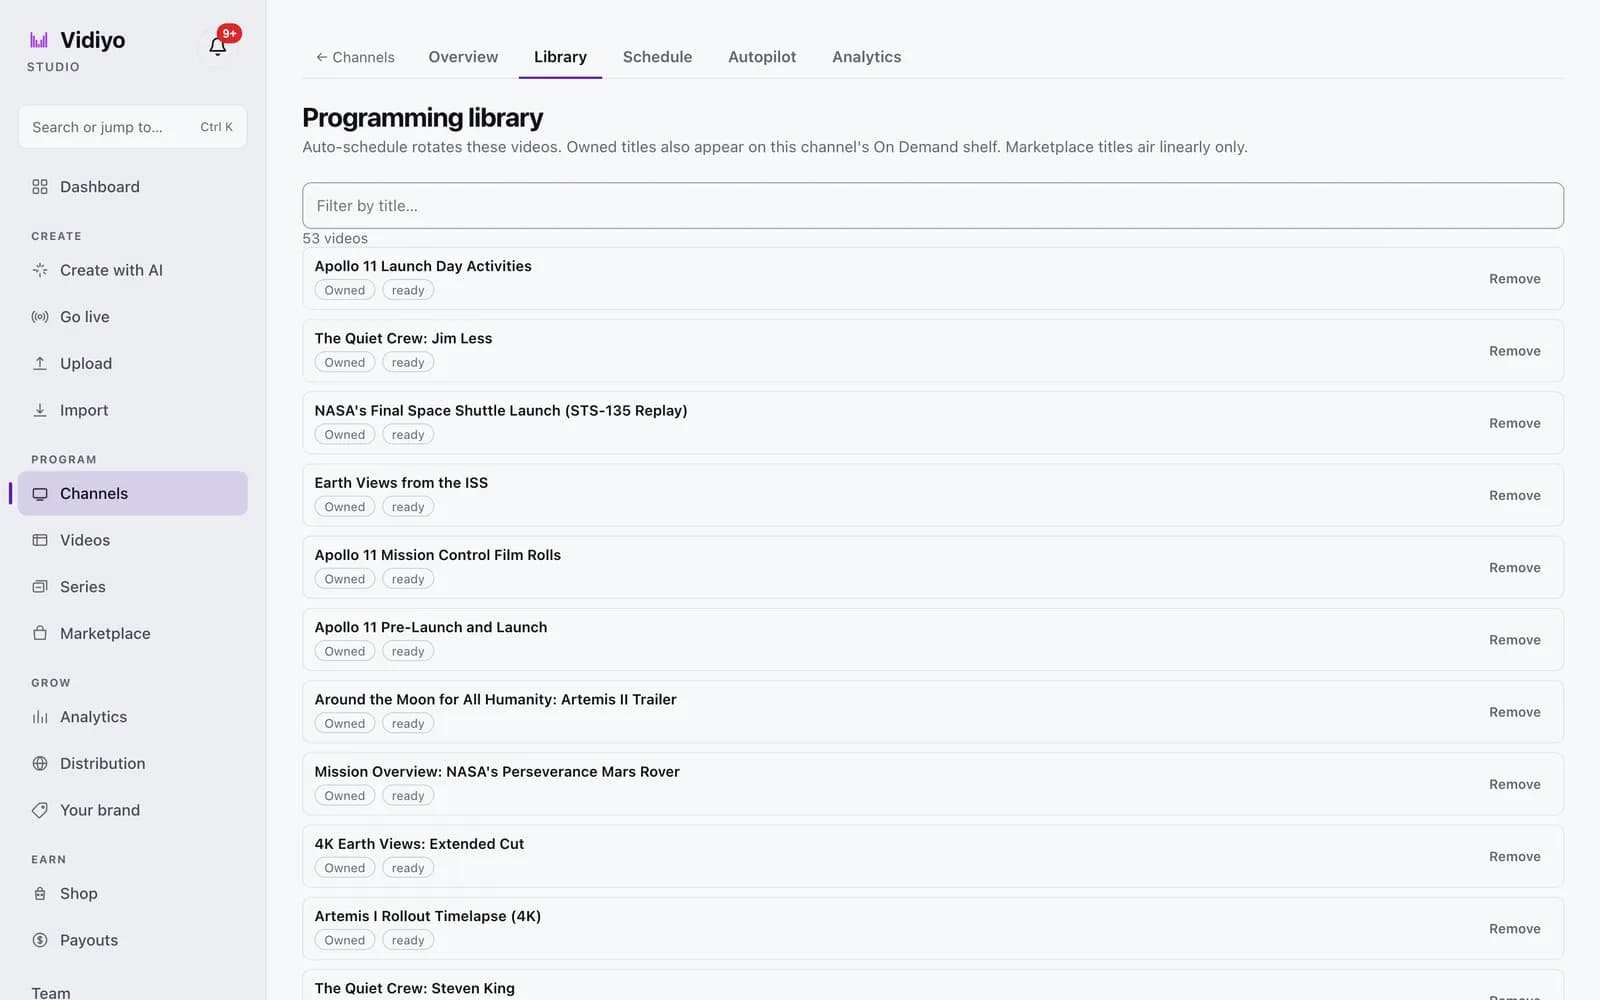
Open the channel and click the Library tab. The Programming library is the pool of videos this channel schedules from. Auto-schedule rotates these videos, and owned titles also appear on the channel's On Demand shelf.
A new channel's library is empty. Add videos in one of three ways.
- On the Upload page, set Assign to channel before you upload. New uploads land in that channel's library.
- In a video's editor, set Home channel, or add it to more channels under Also on channels.
- On the Marketplace page, add another creator's listing to your channel. Marketplace titles air linearly only.
Use Filter by title to find a video, and Remove to take it out of this channel. Removing a video from the library does not delete it. If this channel is the video's home channel, change Home channel in the video's editor first.
4. Check the channel settings
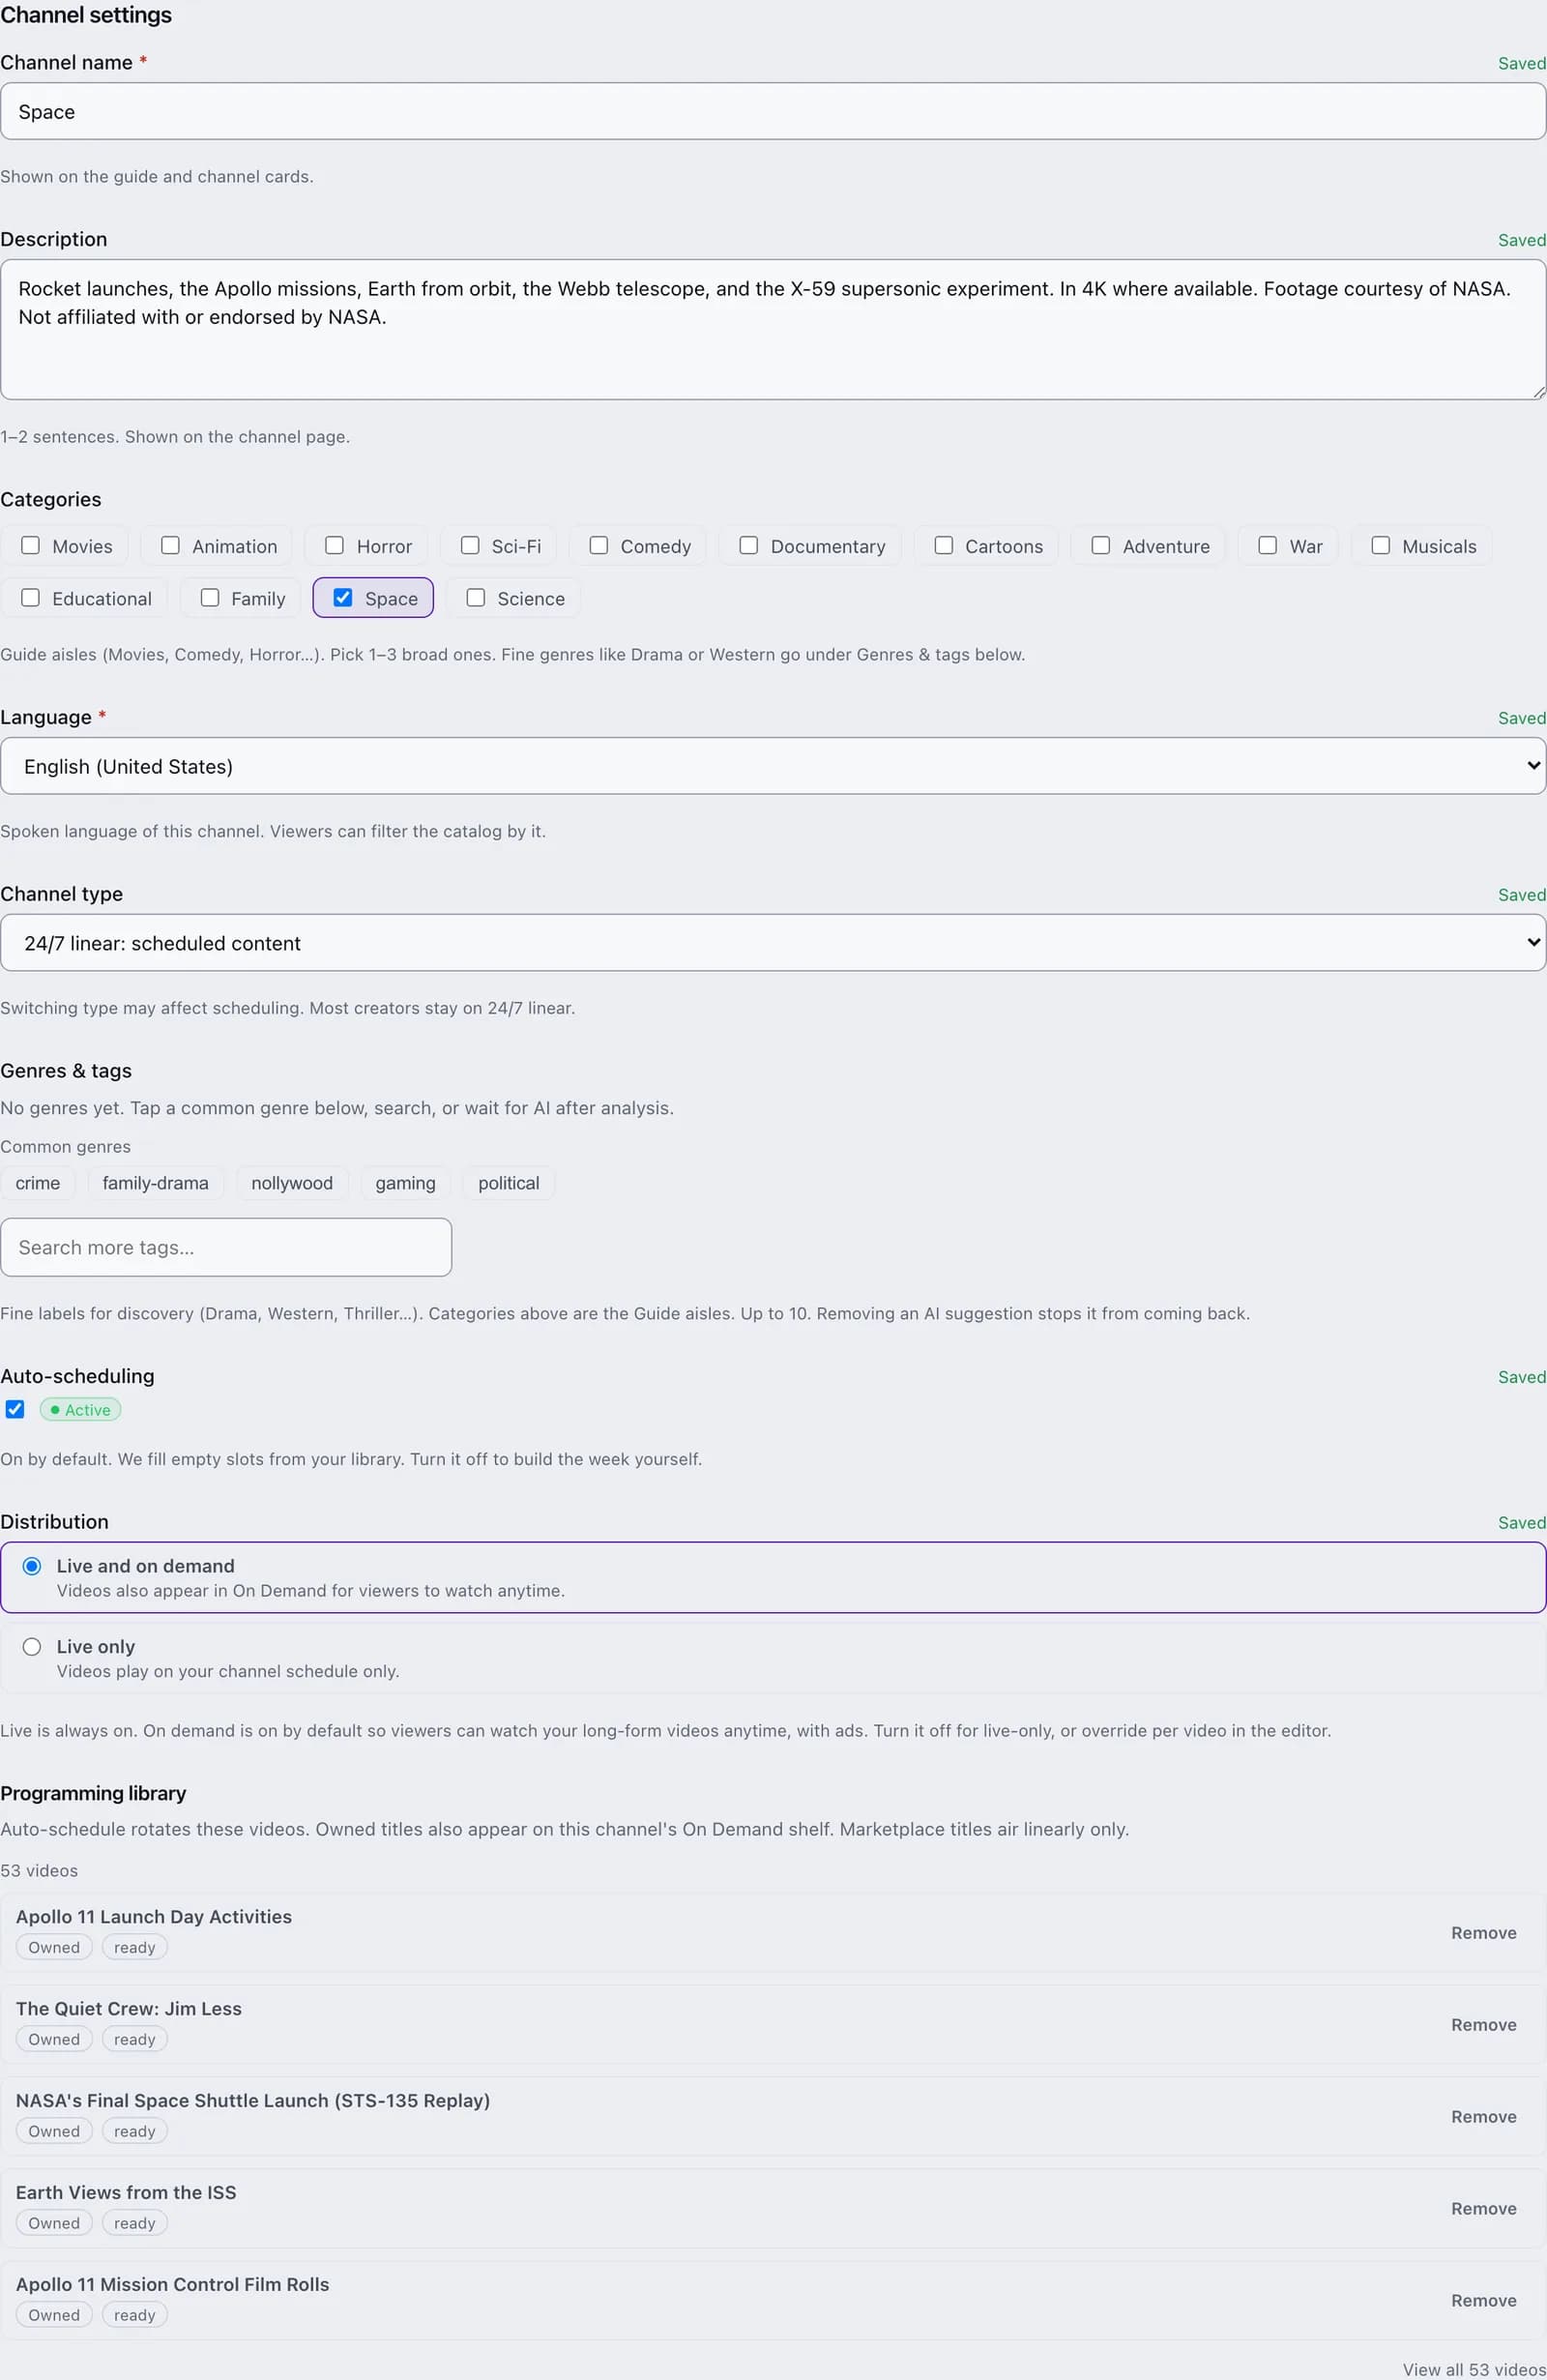
Back on the Overview tab, scroll to Channel settings. Text fields save as you type, and each field shows Saved when it has.
- Description. 1 to 2 sentences, shown on the channel page.
- Categories. Guide aisles such as Movies, Comedy, or Documentary. Pick 1 to 3 broad ones.
- Genres & tags. Finer labels for discovery, up to 10. Common genres appear as chips you can tap.
- Auto-scheduling. On by default. Studio fills empty slots from your library. Turn it off to build the week yourself.
- Distribution. Live and on demand also lists your videos in On Demand. Live only keeps them on the schedule.
Below the settings card, Video orientation shows Unlocked. Locks on your first upload. until the channel has content.
5. Publish the channel
At the top of the Overview tab, click Publish channel. Publish puts the channel on the guide and on Vidiyo apps. Videos that are still processing keep going and join when they are ready.
If the library is empty, Studio refuses with Nothing to air yet and links to the library. Add a video, then publish again.
Once the channel is live, the button changes to Take offline. Click it to remove the channel from the guide without deleting anything.
Tips
- Set Assign to channel on the Upload page before a batch upload. Every file in the batch joins that channel's library.
- The first video you add locks the channel's orientation. Decide whether the channel is landscape or portrait before uploading.
- Leave Auto-scheduling on while you build your library. Turn it off later if you want a hand-built week.
- Use Delete on the Overview tab only when you mean it. Take offline is the reversible option.
Quick answers
Can I change a channel's orientation later?
No. The first video with a known orientation locks the channel, and the settings card then reads Locked. Orientation can't change once you upload content. A landscape channel accepts any video. A portrait channel accepts portrait and square videos only. A video that does not fit is rejected when you add it to the library.
Can I change the audience from general to adult later?
No. The Audience choice is permanent. Adult channels never appear in the public guide, search, or apps. If you need both, create two channels.
What does the Draft chip mean?
A draft channel exists in Studio but is not on the guide or in the apps. You can build its library and schedule while it is a draft. Click Publish channel on the Overview tab when it is ready.
Can I rename a channel after creating it?
Yes. Edit Channel name in Channel settings on the Overview tab. It saves as you type and updates on the guide and channel cards.
How many videos do I need before publishing?
One video that has finished processing. Publish checks the library and refuses an empty channel. A 24/7 channel needs far more than one video to avoid repeats, so keep adding after you publish.
Open Studio
Upload a video, go live, or program your channel. Studio is free, and every guide here walks you through one task.